7 RV Roof Leak Repair on Site Steps That Actually Work
Last Updated: November 17, 2026
Quick Summary
To repair an RV roof leak on site, first find the true source by checking interior stains and then exterior seams, vents, skylights, and the roof edge. Clean and dry the area, remove old sealant, and apply a sealant or patch compatible with your roof membrane.
Water enters uphill and runs along a rafter, so ceiling stains rarely mark the true entry point.
Photograph the interior stain and suspected exterior area before patching for insurance or warranty claims.
Never drive fasteners through the membrane to hold a tarp, and stay off a wet, slick roof.
Sealing over a damp surface traps moisture and turns a small leak into rotted decking.
Self-leveling sealant suits flat areas around vents, while non-sag sealant suits vertical seams and the roof edge.
Tired of chasing the same leak twice?
Sharp RV Services finds and fixes RV roof leaks on site, with transparent pricing before work begins.
Table of Contents
How to Locate the Source of an RV Roof Leak
Water rarely shows up where it enters. Finding the true source of an RV roof leak is the step most owners skip, and it is the reason so many repairs fail twice. A fresh bead of sealant smeared over the wrong seam, while the real gap sits two feet away under a vent flange, is one of the most common patterns in leak repair.
Start inside, then work outward. Interior clues tell you the general area; exterior checks confirm the exact point of water intrusion.
Interior Clues: Stains, Ceiling Rings, and Where Water Travels
A brown ring on the ceiling is a map, not the destination. Water enters uphill, runs along a rafter, and drips at the lowest point it can find.
Check these spots first:
Ceiling stains, especially rings with a darker outer edge
Soft or spongy ceiling panels near vents and skylights
Damp carpet or trim at the roof edge, where water often tracks down the wall
One insider tip: press a dry paper towel against suspect ceiling spots. A faint damp mark means the leak is still active, even if the stain looks old.
Exterior Checks: Seams, Vents, Skylights, and the Roof Edge
Get on the roof only if it is dry and safe to walk. Then inspect in this order:
Roof seams where the membrane meets the front and rear caps
Vent flanges for cracked or lifted sealant
Skylight frames, checking the sealant line all the way around
The roof edge, where the membrane wraps the side rail
Any roof penetration, including antennas, solar mounts, and plumbing vents
Look for cracked sealant, loose sealant, and dark streaks that suggest water is getting under the membrane. For a deeper look at why these seals fail in the first place, read our guide on why RV roof seals need annual inspection.
Immediate Steps to Limit Water Damage Before You Repair
Stop the water first, fix the roof second. Every hour of active water intrusion raises the odds of stained ceilings, delamination, and mold. On site, the constraint is that you are working from whatever is in the rig, at a campsite or roadside, possibly in the rain and possibly after dark. The sequence below is built for that reality.
The First 60 Minutes: Contain, Divert, Document
Work in this order before you touch the roof:
Contain the drip. Move bedding, electronics, and paper goods out from under the leak. Set a bucket or a wide plastic tub under the drip and lay towels around it to catch splash.
Divert water off the ceiling. If water is pooling in a sagging ceiling panel, a common field trick is to press a small towel against the lowest point and wick it into a bucket, rather than letting the panel fill and spread. Do not puncture the ceiling to drain it unless the panel is already failing; a puncture turns a stain into a full replacement.
Kill the source of humidity. Run the roof AC on fan-only mode, open a vent under an awning, or set up a battery fan. Moving air is what actually dries a ceiling; heat alone just cooks the moisture into the panel.
Document everything. Photograph the interior stain, the ceiling, and the suspected exterior area before you patch anything. If the leak turns into an insurance or warranty claim, before-and-after photos are the difference between a covered repair and an argument.
If Rain Is Coming and You Cannot Get on the Roof
A tarp is the correct temporary tool, but how you tie it matters. Weight the tarp down with sandbags, water jugs, or rope tied to the frame or bumper, and never drive fasteners through the membrane to hold it. A tarp that flaps in wind will chafe the membrane and widen the leak. If the roof is wet and slick, do not go up at all; a fall from an RV roof is a far worse outcome than a stained ceiling.
The Decision Point: Patch Now or Wait
A temporary repair is fine here. The goal is to stop water intrusion today and do the permanent fix when the weather and the surface allow it. Use this rule of thumb:
Small, confirmed leak and a dry surface: patch now with tape or sealant.
Unknown source or wet surface: tarp and contain, then diagnose when dry.
Multiple drips or soft decking: stop the water, then plan for a structural repair rather than a surface patch.
Watch out: applying sealant to a wet or dirty surface almost always fails within weeks, and the failed patch hides the original leak point, making the next diagnosis harder. If you cannot get a dry surface, tarp it and wait.
Prepping the Repair Area: Cleaning, Drying, and Removing Old Sealant
Many failed RV roof leak repairs fail at prep, not at the sealant. New sealant will not stick to dirt, moisture, or old cracked sealant, no matter what the tube promises.

Work through these steps:
Clean the surface with a mild detergent and water, then rinse
Let the area dry fully, which can take hours on a cool day
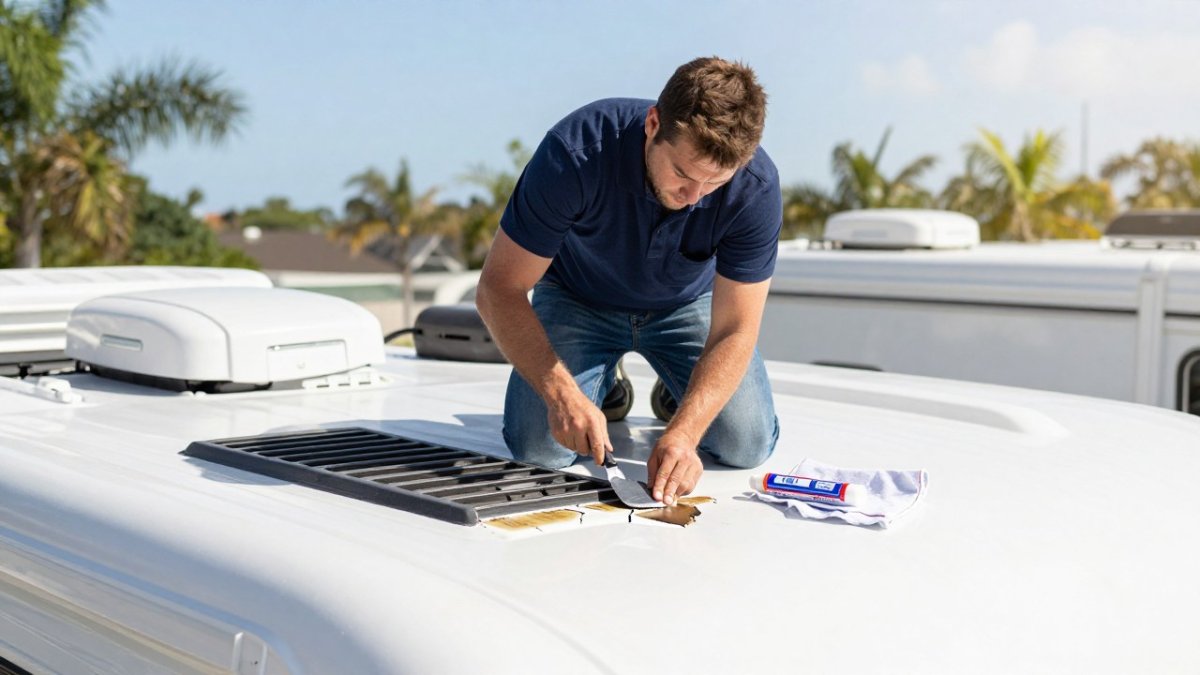
Remove old sealant with a plastic scraper, never a metal blade that can gouge the membrane
Watch out: sealing over a damp surface traps moisture under the patch. That is how a small leak turns into rotted decking.
Choosing a Compatible Sealant or Roof Patch by Roof Material
The right sealant depends on your roof membrane. Using the wrong one can soften the membrane, cause the patch to peel within a season, or void a manufacturer's warranty. This is the single most common reason an on-site repair fails, and it is the step most guides skip.
Identify the Membrane First
Before you buy anything, confirm what the roof is made of:
EPDM is a black rubber membrane, usually with a textured, matte surface. It is common on older and many current Class C and travel trailer roofs.
TPO is a light gray or white plastic membrane with a smoother, slightly waxy feel. It has become the default on many newer units.
Fiberglass is a rigid, gel-coated panel, often with visible seams and a glossy finish.
If you are unsure, check the owner's manual or the membrane manufacturer's labeling, and use the RV Industry Association owner resources to help identify the roof type. Do not guess; a wrong-product patch can cost more to undo than the original leak.
What Sticks and What Fails, by Material
EPDM: Use an EPDM-safe sealant or EPDM patch tape.
TPO: Use TPO-specific sealant or TPO patch tape. Generic products frequently fail to bond to the waxy surface, and some solvents can dull or soften the membrane.
Fiberglass: Accepts a wider range of sealants, but the surface must be scuffed with a fine abrasive and cleaned so the product can key into the gel coat.
Aluminum: Use a sealant rated for metal, and treat seams and rivets as the primary leak points.
Match the Product to the Job
Self-leveling sealant for flat areas around vents and skylights, where it flows out and forms a water-shedding bead.
Non-sag sealant for vertical surfaces and the roof edge, where a self-leveling product would run.
Roof repair tape for quick patches over seams and small membrane damage, especially when you need a repair that does not depend on cure time.
Check the label for material compatibility before you buy, and keep the tube or box; if a patch fails, the product label is the first thing a technician will ask for.
Watch out: mixing products, such as a silicone patch over an EPDM-safe sealant, often creates a bond that fails at the interface rather than at the roof, and it makes the next proper repair harder because the incompatible layer has to be removed first.
DIY RV Roof Leak Repair: Applying Tape, Sealant, and Patches
A clean, dry surface plus the right product gets you most of the way. Application technique does the rest.
Use this sequence:
Lay roof repair tape over small cracks and seam gaps, pressing it down firmly from the center outward
Apply self-leveling sealant around vent and skylight flanges in a continuous bead
Use non-sag sealant on vertical seams and the roof edge
Feather the sealant so water cannot pool against an edge
Let it cure fully before driving or exposing it to rain
Cure time matters. Many sealants skin over in an hour but need a full day to cure, and rain during that window can ruin the job. Check the forecast before you start, and never apply sealant in direct sun on a hot roof.
RV Roof Leak Repair Cost: DIY Materials vs Mobile Service
DIY is cheaper on materials, but the total cost includes your time, the risk of a failed repair, and the damage a slow leak causes. A mobile service costs more up front and removes the guesswork.
Here is how the two paths compare:
Factor | DIY Repair | Mobile Service |
Upfront cost | Sealant, tape, scraper, solvent | Labor plus materials |
Time | Half a day or more | Scheduled visit |
Skill needed | Moderate | None |
Risk of repeat leak | Higher on first attempts | Lower with a proper inspection |
Best for | Small, confirmed leaks | Unknown source, multiple leaks, rotted wood |
For a full breakdown of what on-site work involves, see our guide to on-site RV repairs for motorhome owners. If you want local pricing expectations before you decide, our article on RV repair pricing in Pinellas County covers what drives the bill.
RV Roof Repair Rotted Wood: When a Patch Is Not Enough
A patch fixes the membrane. It does nothing for the wood underneath. If the decking is soft, spongy, or stained dark, the leak has been active long enough to rot the structure, and sealing over it just traps the problem.
Signs a patch will not hold:
Soft spots you can press down with a thumb
Visible dark or crumbling wood at seams and penetrations
A ceiling that sags or feels spongy
At that point, the repair moves from sealing to structural work: cutting out the damaged section, replacing the decking, and re-covering the area. Our step-by-step guide on how to fix a rotted RV floor walks through the same repair logic for structural wood.
Book an On-Site RV Roof Leak Inspection in Pinellas County
Guessing at a leak source costs more than an inspection.
Sharp RV Services comes to you, whether you are at a campground, a storage lot, or home. We handle leaks, AC and water systems, appliances, and exterior cleaning.
If you are ready to stop chasing drips, contact us to schedule an on-site roof leak inspection.
Water always wins when a leak goes undiagnosed.
Frequently Asked Questions
How much does it cost to repair a leak in an RV roof?
DIY materials for an RV roof leak repair on site usually run modestly: a tube of self-leveling or non-sag sealant, a roll of roof repair tape, and cleaner. Professional mobile service pricing depends on the leak source, roof material, and whether rotted wood needs replacement, so ask for a written quote before work starts. Contact Sharp RV Services for a current quote.
Does flex seal tape work on RV roofs?
Tape can hold as a temporary fix, but it is not a permanent repair. Adhesion depends on the roof membrane: EPDM, TPO, and fiberglass each bond differently, and tape applied over dirty or damp surfaces lifts within weeks. Use tape to get through a storm or to your next stop, then clean the area and apply a compatible sealant or patch. A proper RV roof leak inspection tells you whether tape is enough or the membrane damage runs deeper.
Can I repair an RV roof leak from inside?
You can stop water temporarily from inside with a bucket, towels, and a bead of sealant pushed into the visible gap, but this is a stopgap. Water enters at the roof and travels along framing, so the interior stain rarely sits under the actual entry point. A lasting DIY RV roof leak repair happens on the roof: find the source, clean and dry the area, remove old sealant, and apply a compatible sealant or patch.
Can a mobile RV repair technician fix a roof leak at my campsite?
Yes. A mobile technician brings sealant, tape, patches, and inspection tools to your campsite, storage lot, or driveway, so you do not tow the RV to a shop. Call ahead with your roof material and leak symptoms so the technician arrives with the right supplies and cure-time plan.
Comments